The Z-Wave bootloader supports firmware updates through two modes:
- Over The Air (OTA)
- Over The Wire (OTW)
OTA is typically used for end device applications like the Window Sensor via Command Class Firmware Update Meta Data whereas OTW is used for the Serial API application.
The build system compresses firmware images using LZMA and signs the images as well.
Steps
Overall, a successful firmware update requires the following steps:
- Generate signing keys
- Compile firmware image (.hex) and firmware update image (.ota)
- Sign firmware image and firmware update image
- Flash the public key
- Flash the firmware image
- Perform firmware update using the firmware update image
Steps 1-3 is done by the build system per default.
Generating signing keys
While the build system generates keys and signs images by default, these are the manual steps to generate keys:
- Generate a private key: openssl ecparam -genkey -name prime256v1 -noout -out private_key.pem
- Generate a public key from the private key: openssl ec -in private_key.pem --outform DER -pubout -out public_key.der
- Creates a JSON file that includes the tokens for the x and y components of the bootloader's public key. <sdk location>/z-wave/tools/public_key_json.py -i public_key.der -o public_key.json
Make sure to store the keys in a safe place.
The build system generates temporary keys in /build/T32CZ20.<Debug/Release>/temp_keys/, but can be instructed to use the manually generated keys by using ZWSDK_CONFIG_PRIVATE_SIGNING_KEY_PATH and ZWSDK_CONFIG_PUBLIC_SIGNING_KEY_PATH.
Alternatively, copy the temporary keys out of the temp_keys/ directory to retain them.
Flashing the public key
The public key must be flashed to the device before flashing any firmware.
To flash the public key stored in the above JSON file, run the following elcap command:
<jlink_sn> is the J-Link serial number printed on the DKNCZ20 board.
Once the public key has been flashed, you can proceed to FLASH the firmware image.
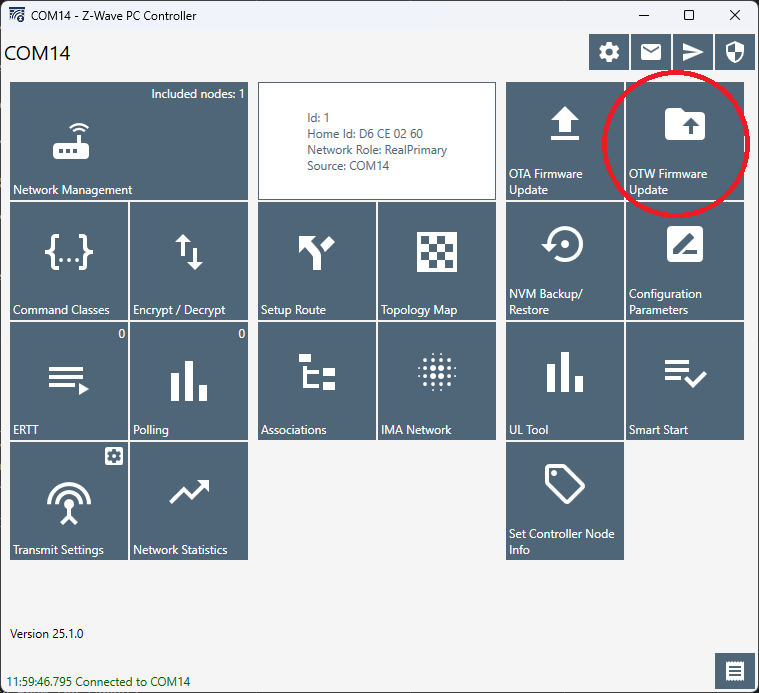
Performing firmware update OTW
This section covers a firmware update OTW using the Z-Wave PC Controller on Windows.
Prerequisites
- The public key is flashed.
- The firmware image is flashed.
- It was verified that the Z-Wave PC Controller can communicate with Serial API.
Steps
- Click the "OTW Firmware Update" button and expect an "Open" dialog:
- Find the directory containing the firmware update image (.ota)
- Type *.ota in the "File name" field to show .ota files
- Select the .ota file containing 255 in the filename.
- Press OK and wait for the firmware update to finish.
- Verify the firmware update by inspecting the "Z-Wave device firmware" in the "Network Management" view.
OTW details
The Z-Wave bootloader uses the Xmodem protocol to receive the OTW image.
The bootloader only supports Xmodem-CRC32.
The bootloader default UART is UART0 using a 115200 baud rate with 8 data bits, and 1 stop bit and no parity bit.
The txd and rxd pins are 17, and 16 subsequntly.
The used UART can be changed by implementing the API Zpal_otw_hw_config.
To initiate the OTW update process, follow these steps:
- The host should send the following SerialAPI command to the target: The target should respond with an ACK:0x01 0x03 0x00 0x27 0xDB0x06
- The host must wait for the following sequence from the target: The host must then respond with:0x3E 0x64 0x430x31
- The host must now wait for a response of 0x43 from the target.
- Once received, the host can start sending the OTW image to the target using the Xmodem protocol.
- After the host has finished sending the OTW image, the target will reboot to begin the update process.
- When the target bootloader completes the update process, it will reboot again to jump to the application.