Setting up a Z-Wave network
Building a Z-Wave network requires 1 controller and 1 or more end devices. If you want to follow the actual Communication flow, a sniffer is required, but the network doesn't need to function properly.
Build and program the boards
- Create, build and flash a project based on the Z-Wave Serial API
- Create, build and flash a project based on the Z-Wave Switch On/Off
You now have your controller and your end device. The Switch On/Off is the end device, and the Serial API is your controller firmware.
- (Optional) Create, build and flash a project based on the Z-Wave Zniffer firmware
This is your firmware for the network sniffer
Starting the PC controller and PC sniffer
Starting and connecting the PC controller (Windows only)
The PC controller will start up and try to connect to a board with Serial API firmware.
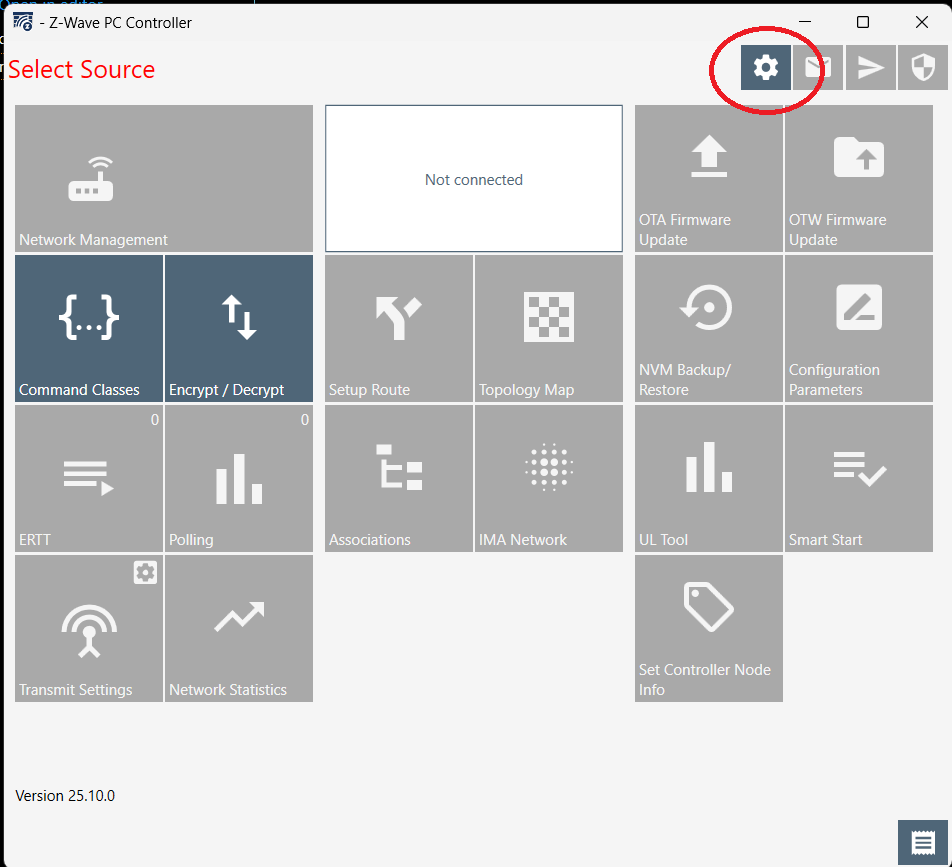
To select the serial port of the board using the Serial API, click the gear icon in the top right corner.
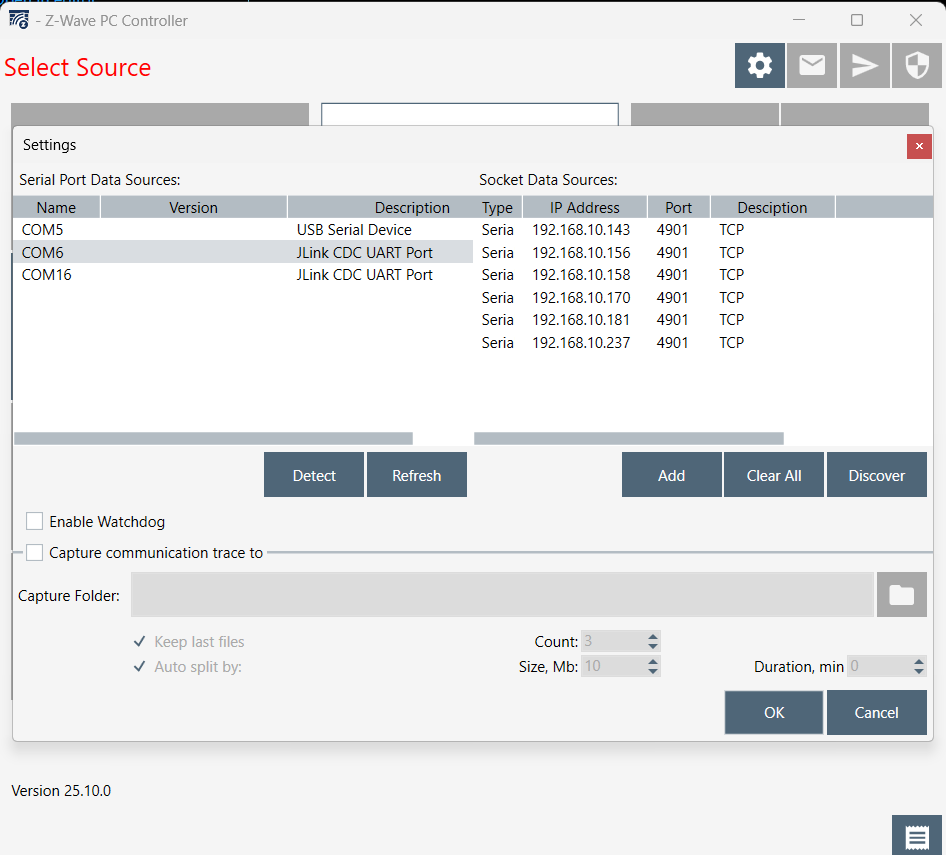
Click on the serial port of the board with the Serial API and click ok.
Note: If you are not sure what serial port to use, you can click the 'Detect' button to find it.
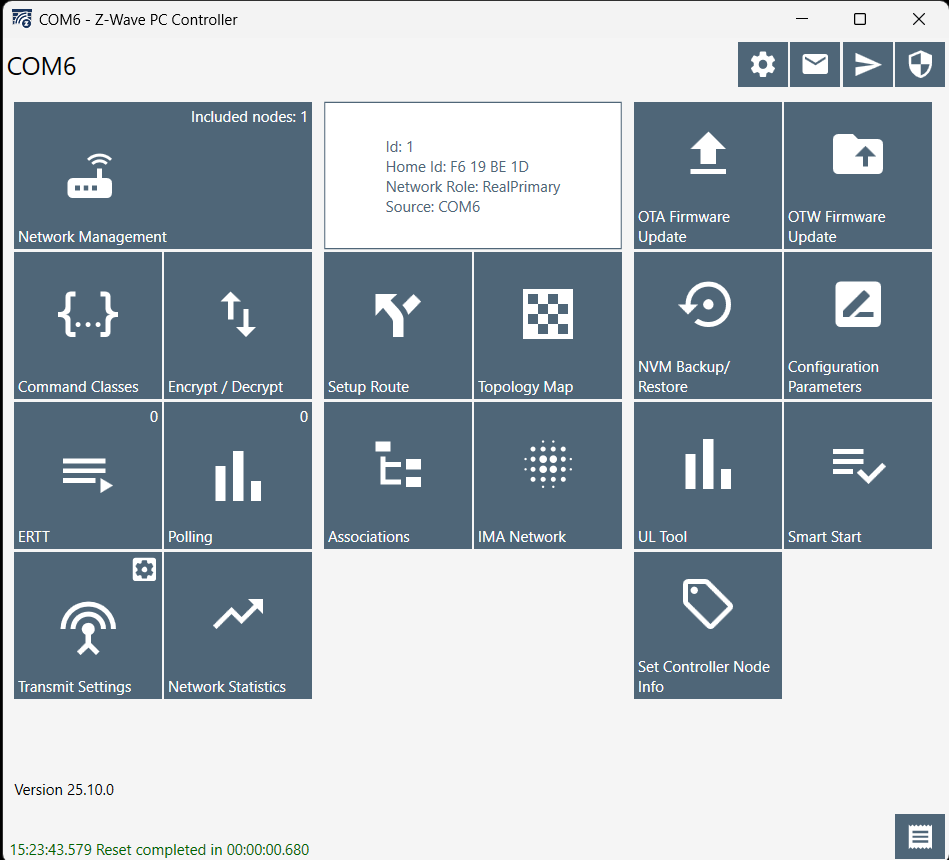
The PC controller should now be connected to the board and all functionality should be enabled.
Including the end node into a network
To add the end node to the controller with Smart Start inclusion the controller needs to know the DSK of the node to be included. The DSK is generated on the first boot-up in the end node and is stored as a manufacturer token in the flash. To read it out use elcap with the tokens command:
Copy the printed QR code.
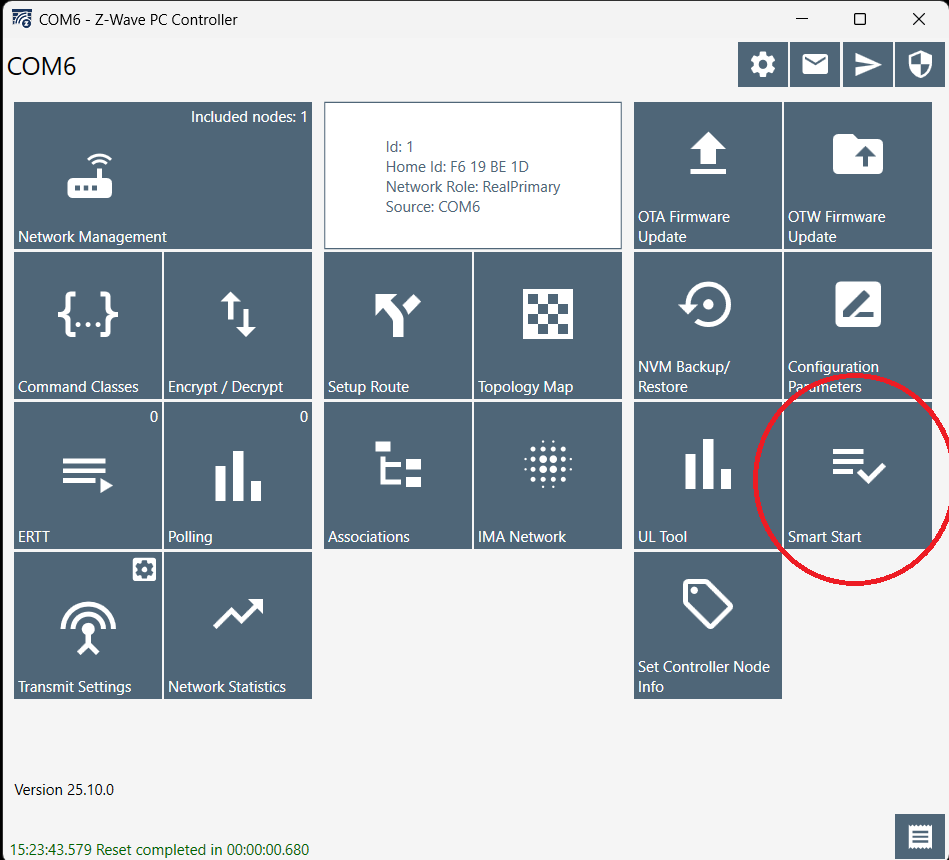
Now, go into the Smart Start section of the PC controller program.
Press the scan DSK button to add the QR code to the controller.
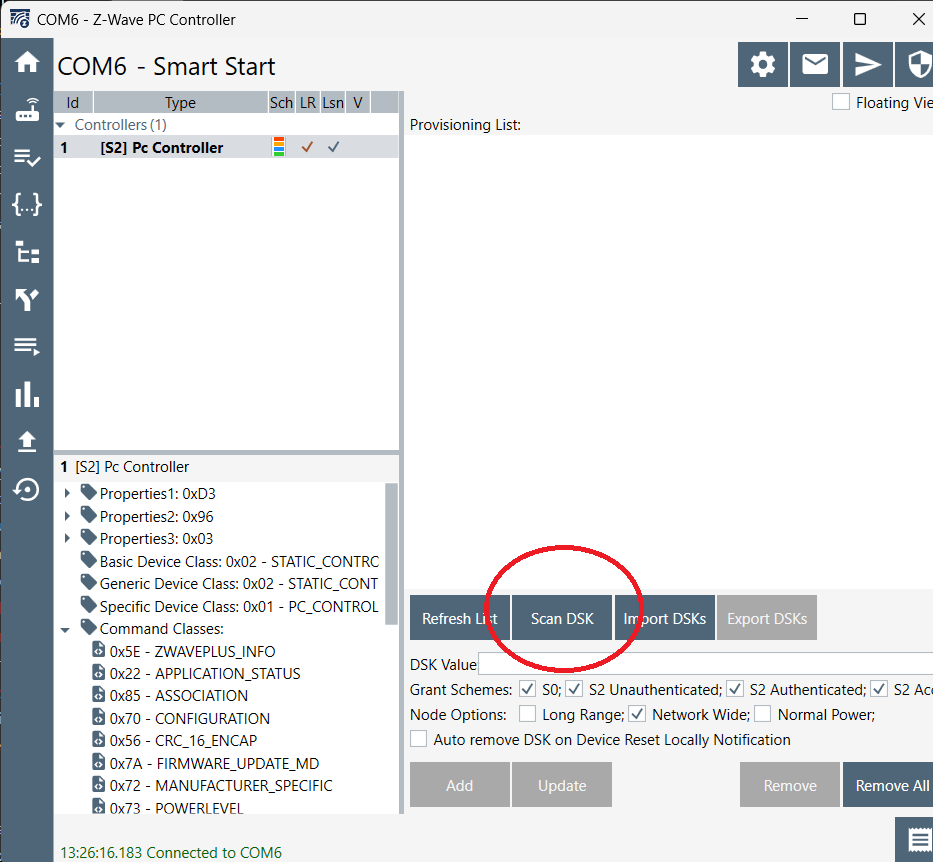
Paste the QR code string copied from the token into the DSK window and press ok

The PC controller should now automatically include the end node into the network. The inclusion is based on a timer with an increasing timeout, so it might take a while before it gets included. If you want to speed up the process, you can press the reset button on the end device board to restart the inclusion timer.
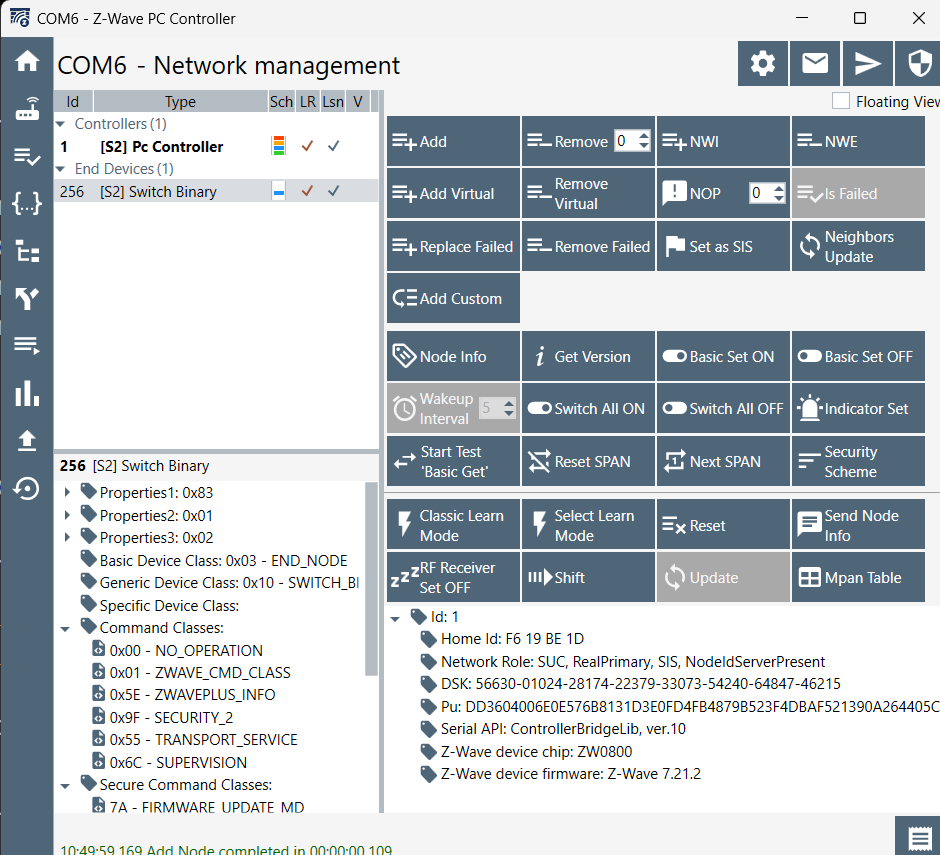
If you go into the Network Management section in the PC controller, you should now see the Switch in the network list
Controlling the end node
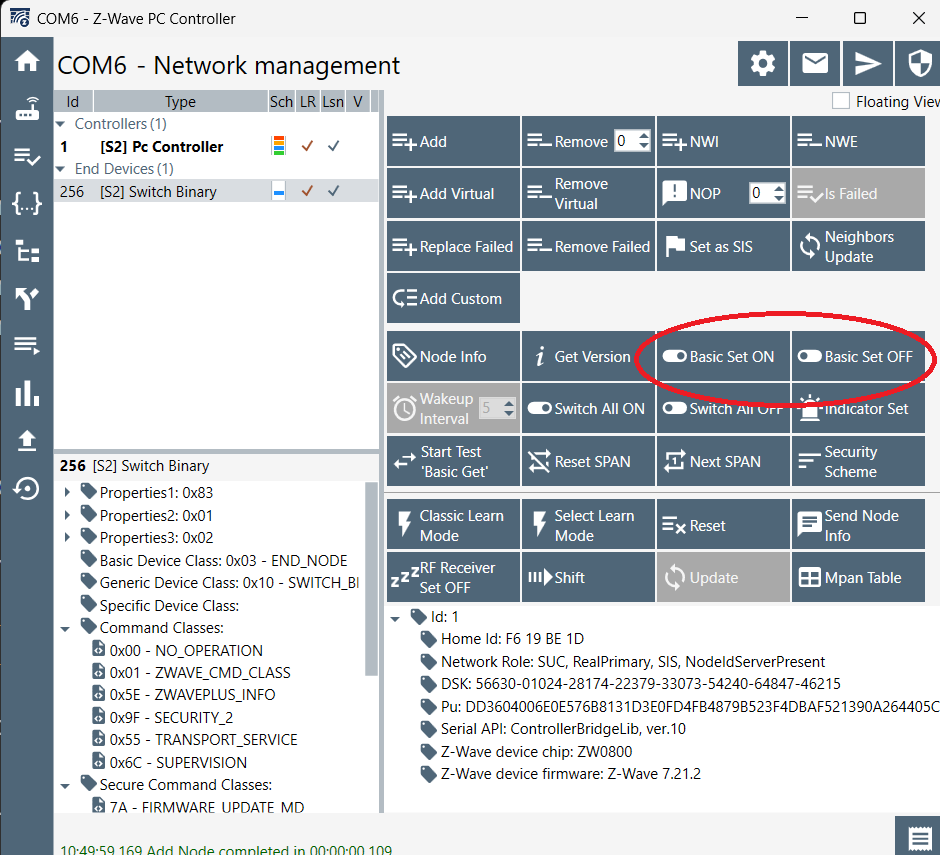
To control the newly included Switch On/Off, highlight it in the network list and press the 'Basic Set ON' to turn the LED on or the 'Basic Set OFF' to turn the LED off.
Running the PC sniffer
Starting and connecting the PC sniffer (Windows only)
The PC sniffer will start up and try to connect to a board with zniffer firmware.
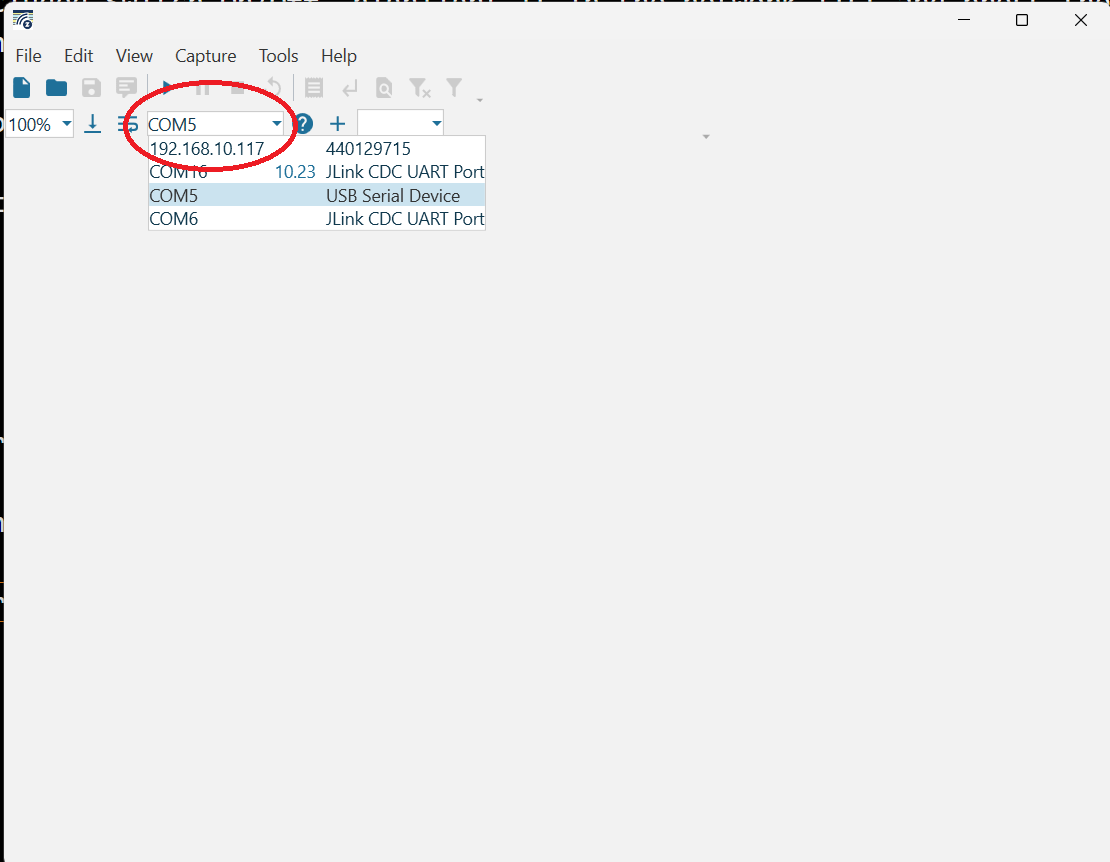
To select the serial port of the board with the zniffer firmware, click the COM port list and select the COM port where the board with the zniffer firmware is connected.
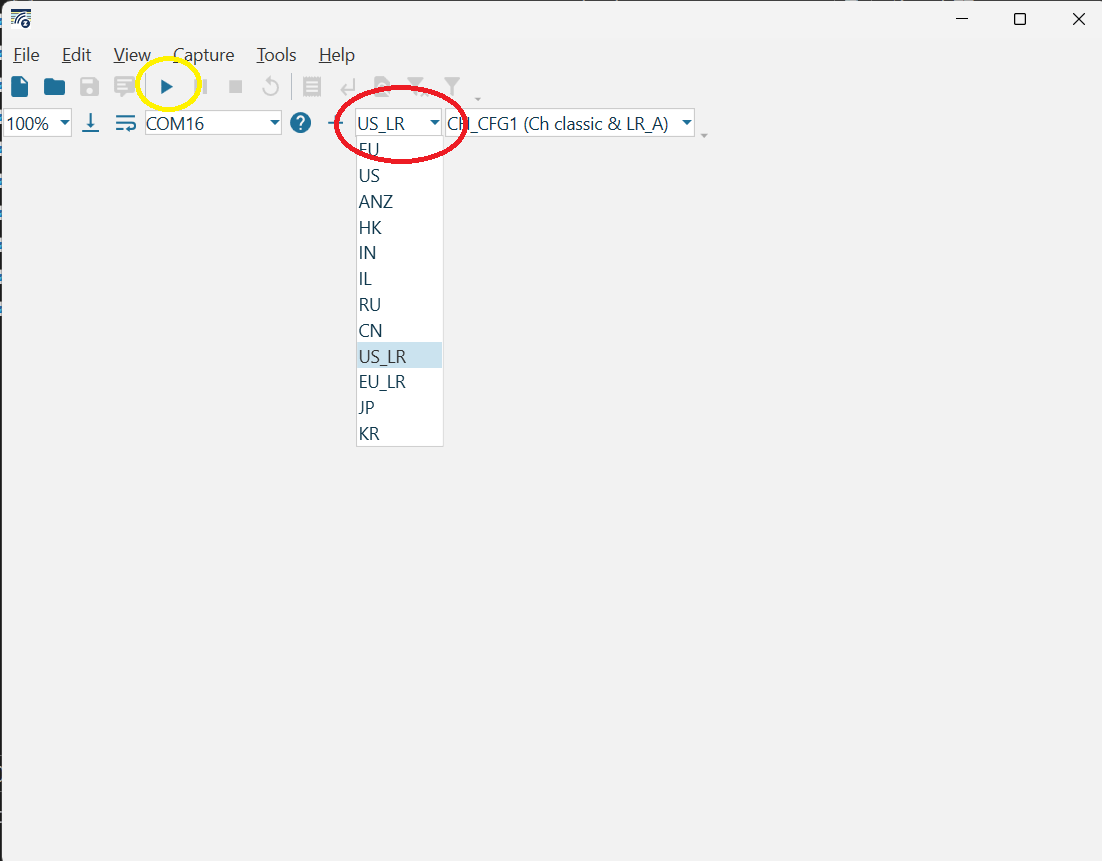
How to choose the region matching the region of your applications (default US_LR) and press the play button to start listening for Z-Wave frames.
In the PC controller, try to control the Switch as described in Controlling the end node
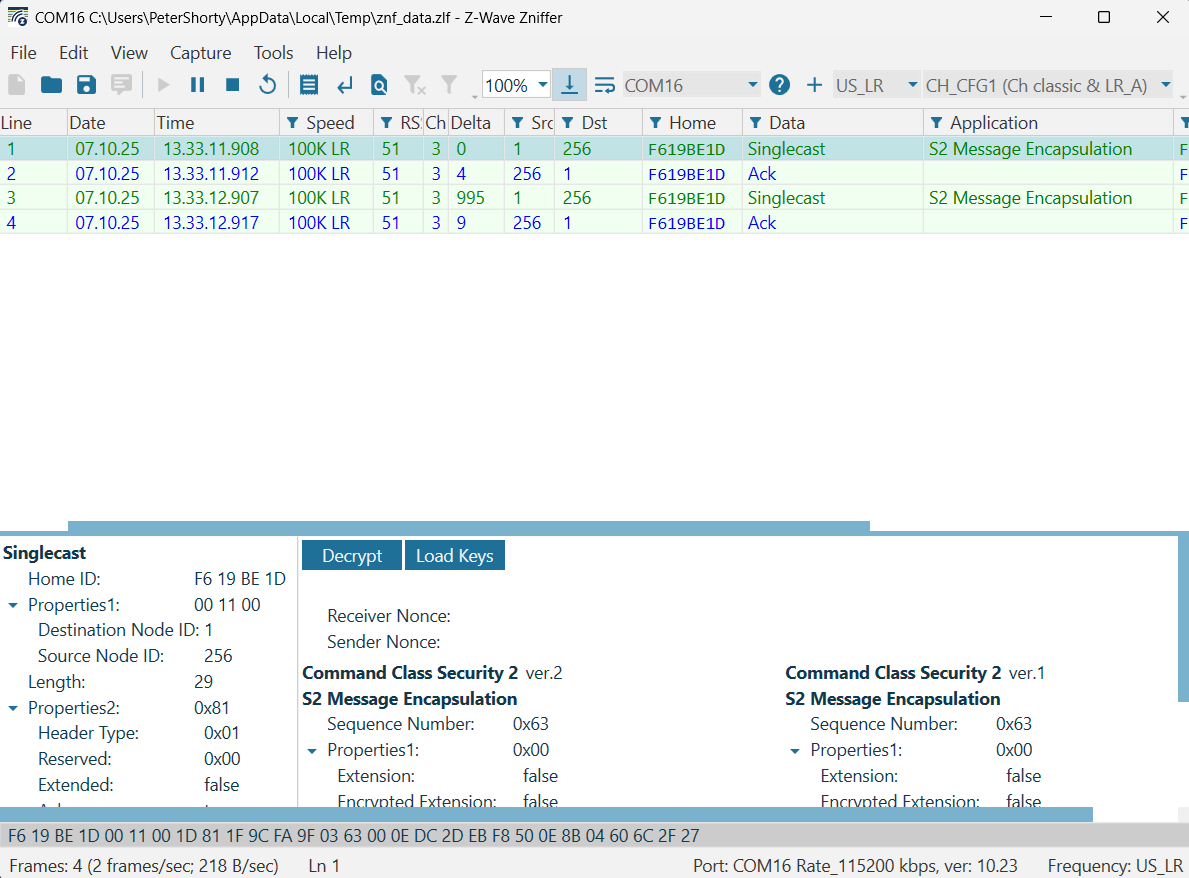
You should now see frames in the frame view of the PC sniffer.
Decrypting frames in the PC sniffer
Because Z-Wave, by default, will use security and encrypt all frames, it is not possible to see the actual command in the frame. The sniffer will show that it is a frame using 'Command Class Security 2' But not the on/off command, as that is part of the encrypted payload. In order to decrypt the frame payload in the PC sniffer, it needs to know the network key of the network. The network key can be found in the PC controller.
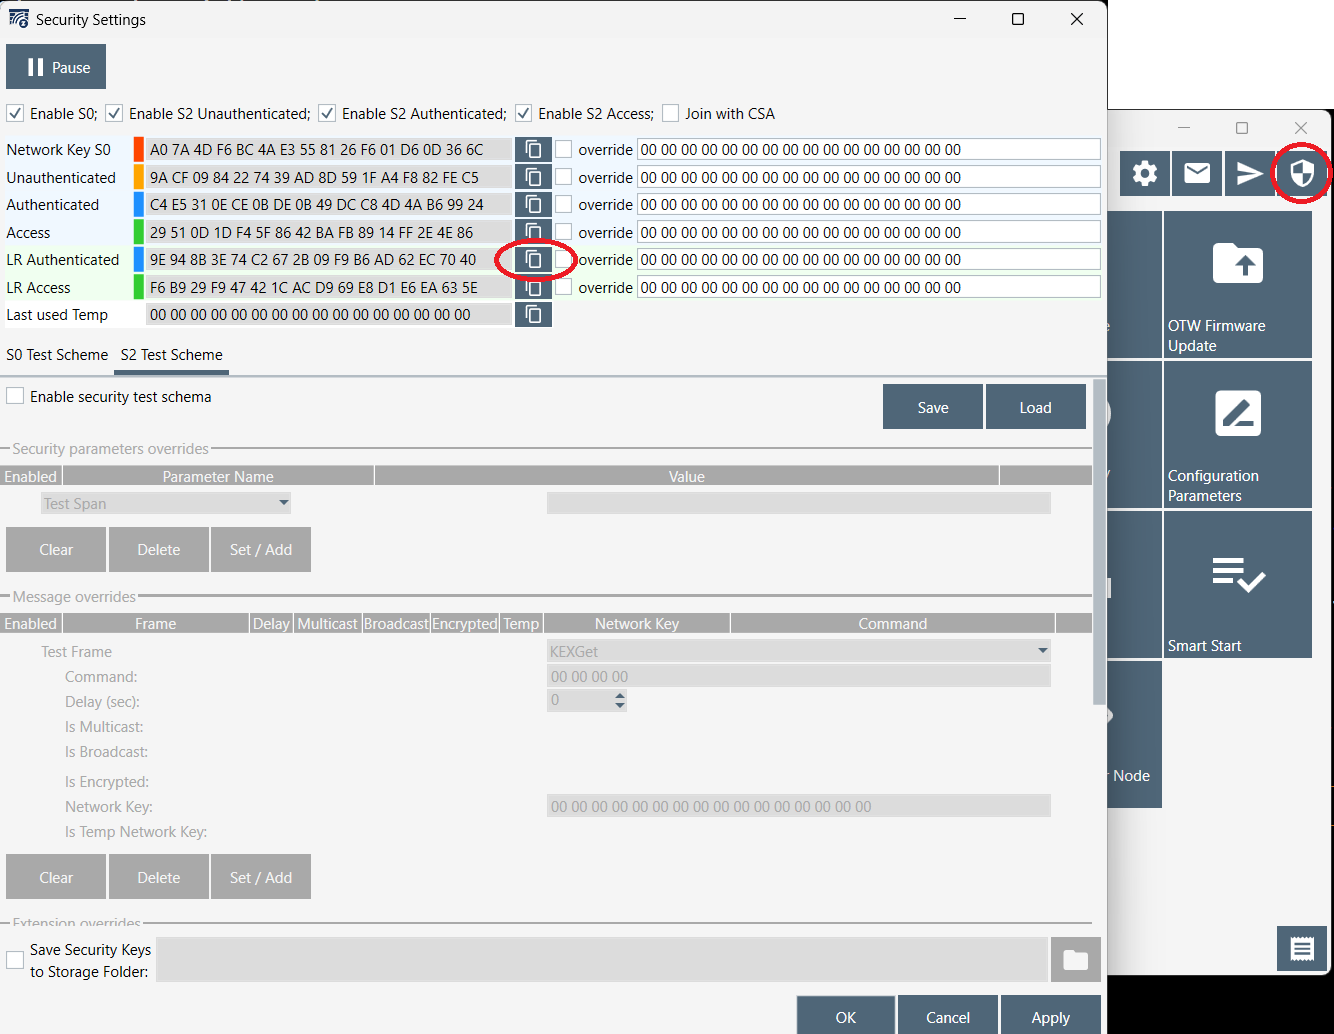
Click on the 'Shield' icon in the top right corner to access the security information in the PC Controller.
You now see a list of security keys used by the PC controller. For this example, we are including the node with Z-Wave LR, so it is the 'LR Authenticated' key we should use to decrypt the frames. Click the Copy icon next to that key to copy it to the clipboard.
Now go back to the PC sniffer and click on the 'Decrypt' button in the frame details view, and paste the copied the key into the dialog box.
The PC sniffer now has the key, but is still not able to decrypt the frames because it needs to know the sequence number (NONCE) used in the secure communication. To trigger a resynchronization of the NONCE in the security algorithm, press the reset button on the Switch On/Off to get it out of sequence and try to control the Switch On/Off again with the PC controller. The PC sniffer should now be able to decrypt the frame and show the 'Basic Set' command
