Overview
The ZCL Advanced Platform (ZAP) tool is an open source ZCL configuration interface that provides users with an easy way to create, modify, and generate ZCL configurations for a device.
Setup
ZAP (ZCL Advanced Platform) dependency management is now handled automatically by elcap. When you use the elcap project zap command from within your Zigbee project directory, elcap will automatically ensure you have the correct version of ZAP for the current SDK version.
- Note
- The ZAP version is tied to the SDK version, not to elcap itself. This ensures your project will never be broken by keeping your Trident tools up to date.
No manual installation or configuration of ZAP is required. Simply navigate to your Zigbee project directory and run elcap project zap - elcap will handle the rest.
Invoking ZAP
Invoking ZAP to configure the ZCL portion of a Zigbee project can happen in 2 ways.
Method 1: Terminal Window
ZAP can be invoked using elcap from the command line in a terminal window directly. elcap will automatically manage the ZAP dependency and ensure you have the correct version.
- Navigate to your zigbee project directory in the terminal of your choosing.
- Run command elcap project zap.
- Observe ZAP window open.
Method 2: VS Code Run Task
Opening a Trident Zigbee project inside of VS Code enables custom VS Code Tasks to be used for doing things like building a project, flashing it to a device, and opening the ZAP configuration tool.
- Open your Trident Zigbee project in VS Code.
- Open the command palette using Ctrl+Shift+P on Linux and Windows, or Cmd+Shift+P on MacOS.
- Type "Tasks: Run Task" into the command palette and select the "Tasks: Run Task" option.
- Observe the [Trident-IoT] tasks appear in the task list.
- Select [Trident-IoT] ZAP and press enter.
- Observe ZAP window open.
Using ZAP
Once ZAP is open, you can use it to configure everything ZCL for your Zigbee project. This includes adding/removing/configuring:
- Endpoints
- ZCL clusters/attributes
- Supported commands
- Attribute reporting
- MFG ID
- Default response policy
- Etc.
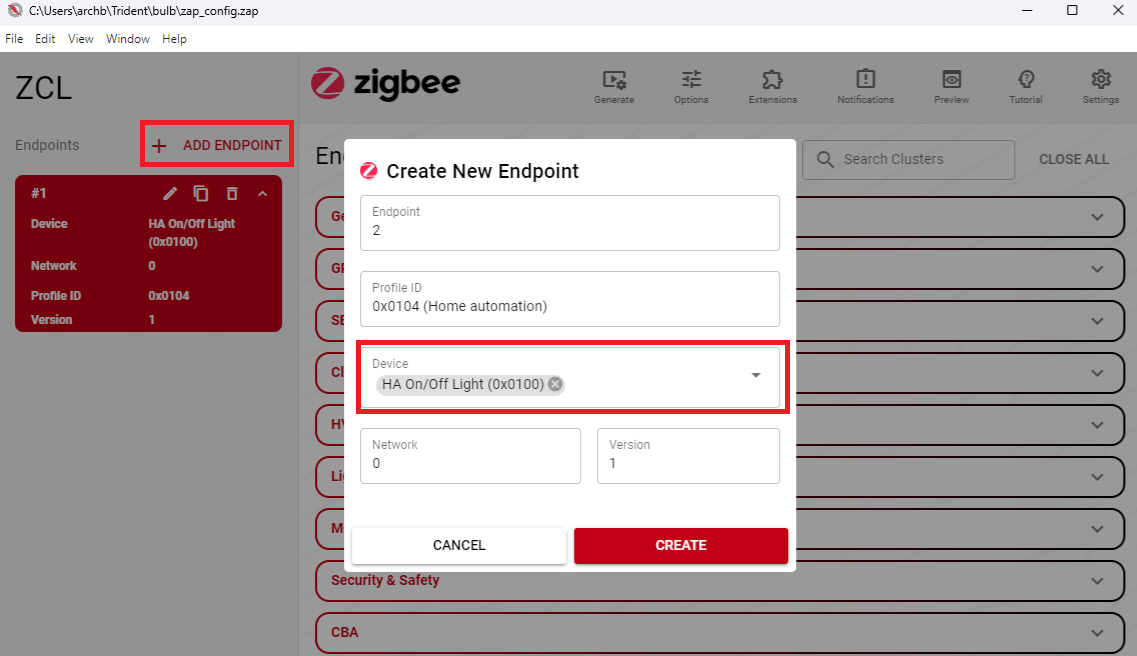
Adding an Endpoint
To add an endpoint in ZAP, click the "+ Add Endpoint" button on the left of the screen, select the Device Type from the "Device" drop down menu, and click "Create".
Adding Clusters
Adding a cluster can be done by selecting the endpoint you wish to modify and check the "Client" or "Server" box next to the cluster.
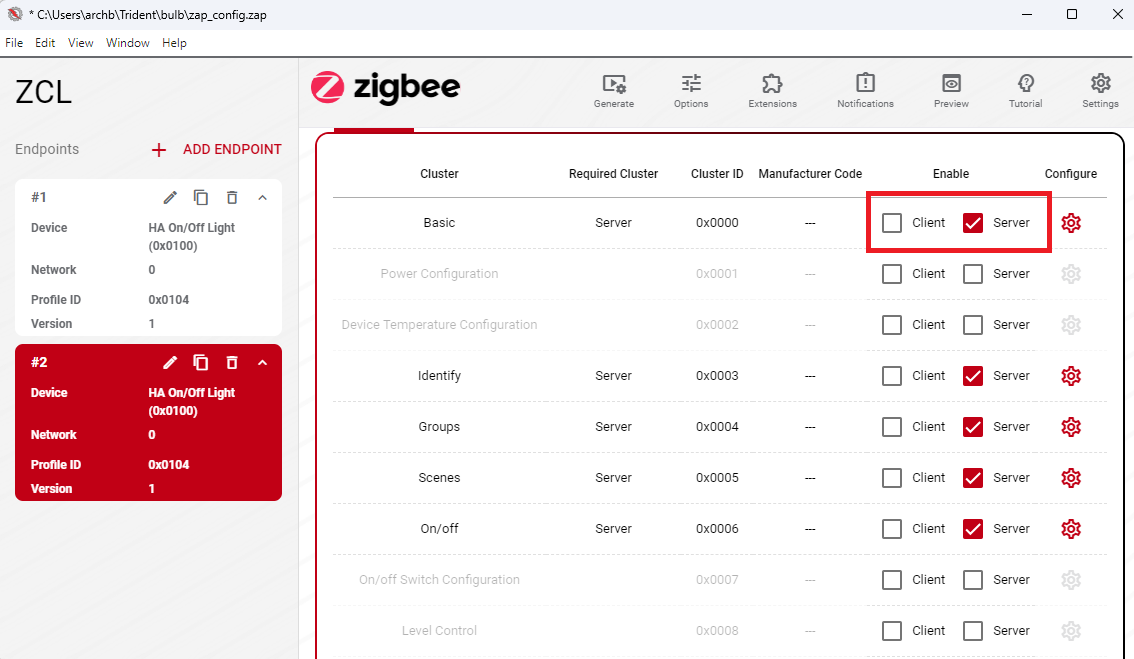
- Note
- The OTA Bootloading Cluster MUST not exist on multiple endpoints!
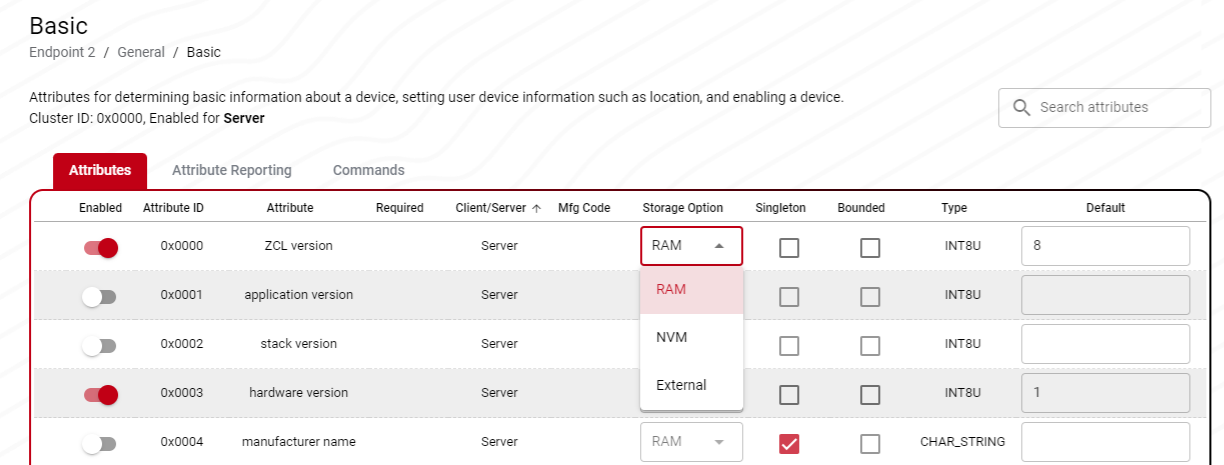
Adding Attributes
Adding/modifying attribute configurations can be done by selecting the gear icon next to an enabled cluster. Once inside the cluster menu, enable attributes by activating the "Enabled" option next to the attribute of choice. The default value for the attribute can be entered on the right hand side of the screen. Attribute storage can be selected as RAM, NVM, or external. To handle external attributes please see tr_zcl_external_attribute_read_cb.
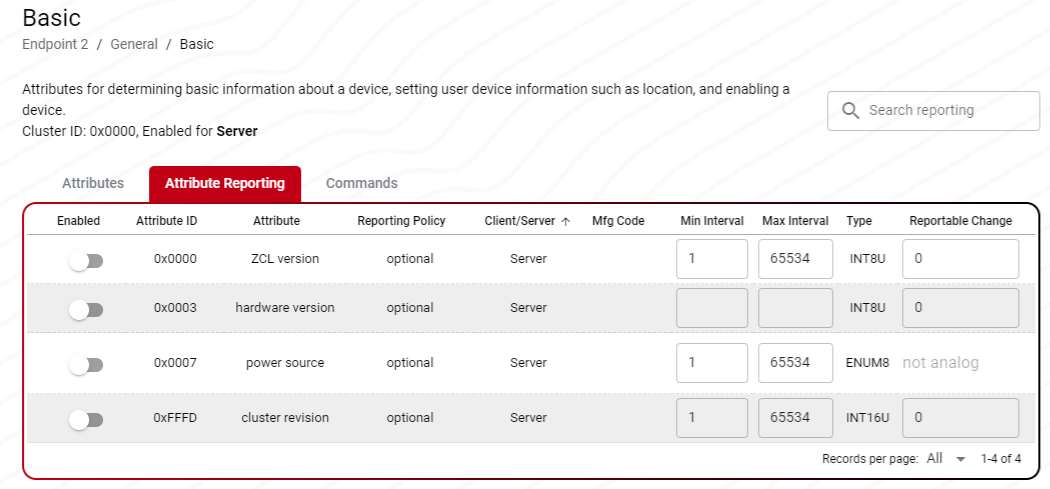
Attribute Reporting Configurations
Default attribute reporting configurations can be modified from the "Attribute Reporting" tab within the cluster configuration page. Reporting options are configurable for any enabled attributes.
Adding Commands
Incoming and outgoing commands can be enabled by navigating to the "Commands" tab within the cluster configuration page and checking the box next to which command(s) you would like to support.
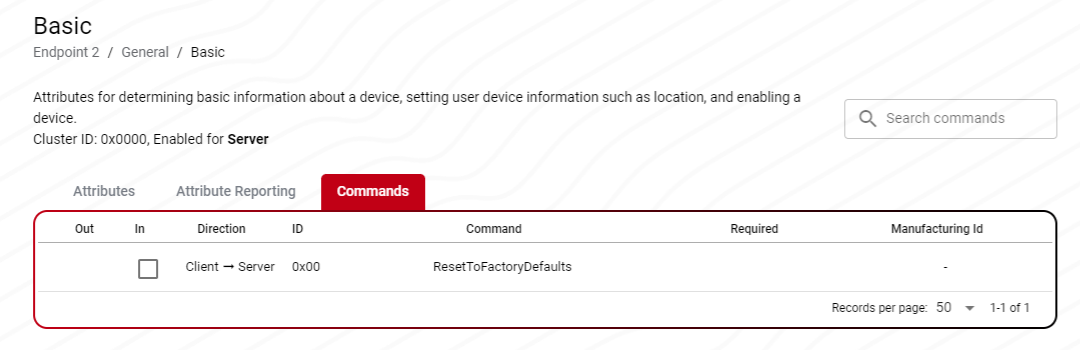
- Note
- The supported commands must be the same for each cluster that is shared across multiple endpoints
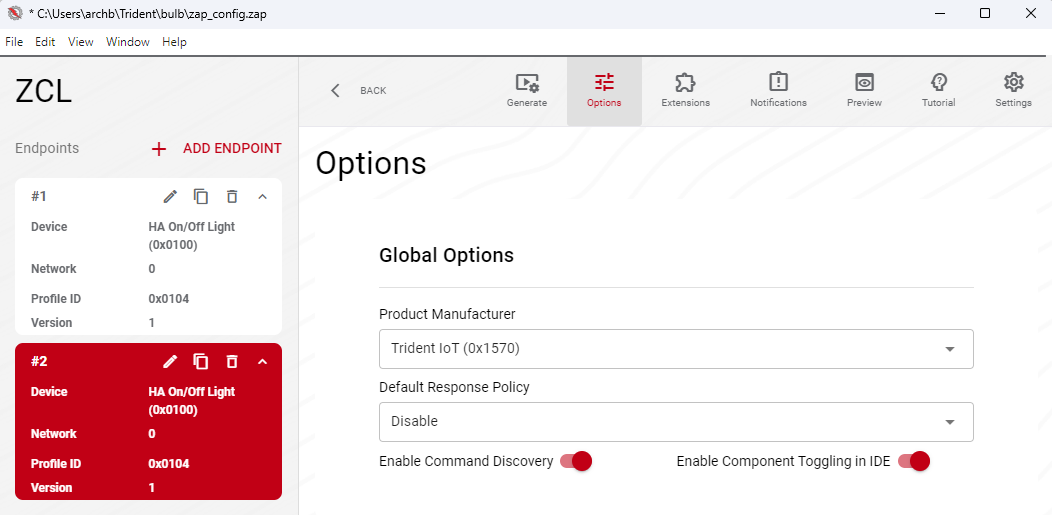
Global Options
Global options can be configured to set things like the product manufacturer ID and the default response policy. This is done by clicking the "Options" menu at the top of the screen and making the desired selections.
Generating Project Outputs
The current implementation of ZAP in the Trident ecosystem requires a manual generation step where you must navigate to the directory in which the generated ZAP files should live. This will be solved in future releases.
Once ZCL configuration changes have been made, generate the resulting files into your project by:
- Saving your new ZAP configuration using "Ctrl+S".
- Click the generate button at the top of the ZAP UI.
 ZAP Generate Button
 - Navigate to the "generated" directory inside your project
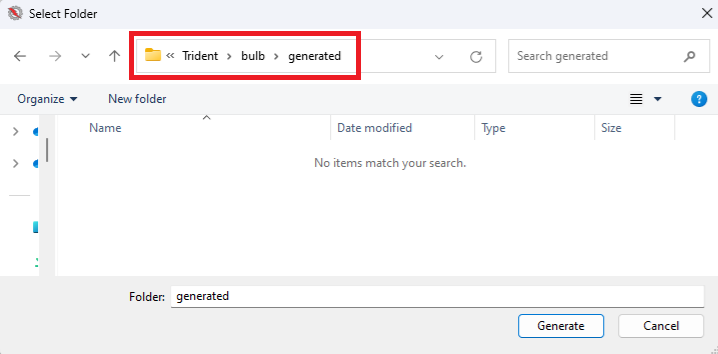 Setting path to generated directory for a bulb project
 - Click generate.
Once the files have been generated into your Zigbee project, you can rebuild the project and the changes will have taken place.
- Note
- Adding a ZCL cluster will add the cluster to the descriptor for the device but does not automatically add functionality. To add ZCL functionality for a cluster please reference the Plugin Configuration Guide.