Welcome
Welcome to the Trident IoT SDK! This is the starting point for developing both Z-Wave and Zigbee based IoT products. This guide will explain how to get started using the Trident IoT development tools and do a short run through of the steps necessary to create a project, build it, and flash it to a board. This is intended to be a high level overview with more detailed explanations for the various pieces found at:
Prerequisites
Software
Make sure that elcap has been previously installed and is passing all checks from command:
Please see the elcap documentation page for instructions on how to do this.
Hardware
You will need one of the Trident development kits and a USB-C cable to get started. Please see the Trident Hardware page for available development kits.
Creating a Project
A new project is created by using the elcap new command. Running elcap new from a terminal window will walk you through the steps to create a project. These steps are:
- Start new project wizard with command:
- Enter the name you would like to use for your project
- Enter the path to where you would like the project directory to get created (default = project name in the current directory)
- Select SDK version
- Select a project category (protocol of interest or bootloader to make a standalone bootloader application)
- Select a sample applications
- Select a chip target
- Confirm project generation
- Note
- Protocol specific sample applications contain the bootloader within the project and will create combined hex files as part of the build. It is not required to create a standalone bootloader to get the sample applications to run.
Building a Project
Once the project has been created, building it can happen using 2 different methods. The first is from the terminal window by invoking elcap commands directly within the project directory. The second is using custom Trident IoT tasks from within VS Code. See VS Code Integration for more details around VS Code support.
- Note
- A Trident IoT VS Code extension is currently in development, but in the meantime, we've provided custom Tasks to support Trident projects within VS Code.
Method 1: Terminal Window
- Navigate to the previously created project directory from a terminal window
- Run command
Method 2: VS Code
- Open previously created project directory in VS Code
- Open the command palette using
Ctrl+Shift+P on Linux and Windows, or Cmd+Shift+P on MacOS.
- Type "Tasks: Run Task" into the command palette and select the "Tasks: Run Task" option.
- Observe the "[Trident-IoT]" tasks appear in the task list.
- Select "[Trident-IoT] Build (Debug)" and press enter.
- Debug build can also be invoked using
Ctrl+Shift+B on Linux and Windows, or Cmd+Shift+B on MacOS.
- Note
- If the CMake extension is installed in VS Code, then an invalid CMakeCache.txt file is created when the Trident project is first opened. To fix this run the task "[Trident-IoT] Clean Build" before performing the build step.
Flashing a Project
Similarly to building a project, flashing can be done from either the terminal window using elcap commands directly or from VS Code using the custom Trident IoT Tasks. See VS Code Integration for more details around VS Code support.
Method 1: Terminal Window
- Verify that the terminal window is within the previously built project directory.
- Discover all attached development kits/programmers with command:
- Use the serial number for your development kit found in step 2 to flash your device with command:
elcap flash --usb <serial-no>
Method 2: VS Code
- Verify that previously built project directory is open inside VS Code.
- Open the command palette using
Ctrl+Shift+P on Linux and Windows, or Cmd+Shift+P on MacOS.
- Type "Tasks: Run Task" into the command palette and select the "Tasks: Run Task" option.
- Observe the "[Trident-IoT]" tasks appear in the task list.
- Select "[Trident-IoT] Discover Attached Devboards" and press enter.
- Note the serial number for the attached development kit in the VS Code terminal window.
- Open the tasks.json file inside the .vscode directory within the Trident project.
- Search for EditVsCodeTasksJsonToAddDevboardSerialNumber and replace it with the serial number from step 7.
- Open the command palette to run Task "[Trident-IoT] Flash Hexfile".
- Observe flash status in the VS Code terminal window.
Debugging a Project using SEGGER Ozone
In this guide, we will demonstrate how to debug a Z-Wave project using SEGGER Ozone ICE. We assume you have already used elcap to create a project named "my_switch," based on a Z-Wave SwitchOnOff running on the T332CZ20B module.
- Flash the project hex file using elcap.
- Start Ozone and click on the 'Open Existing Project' button.
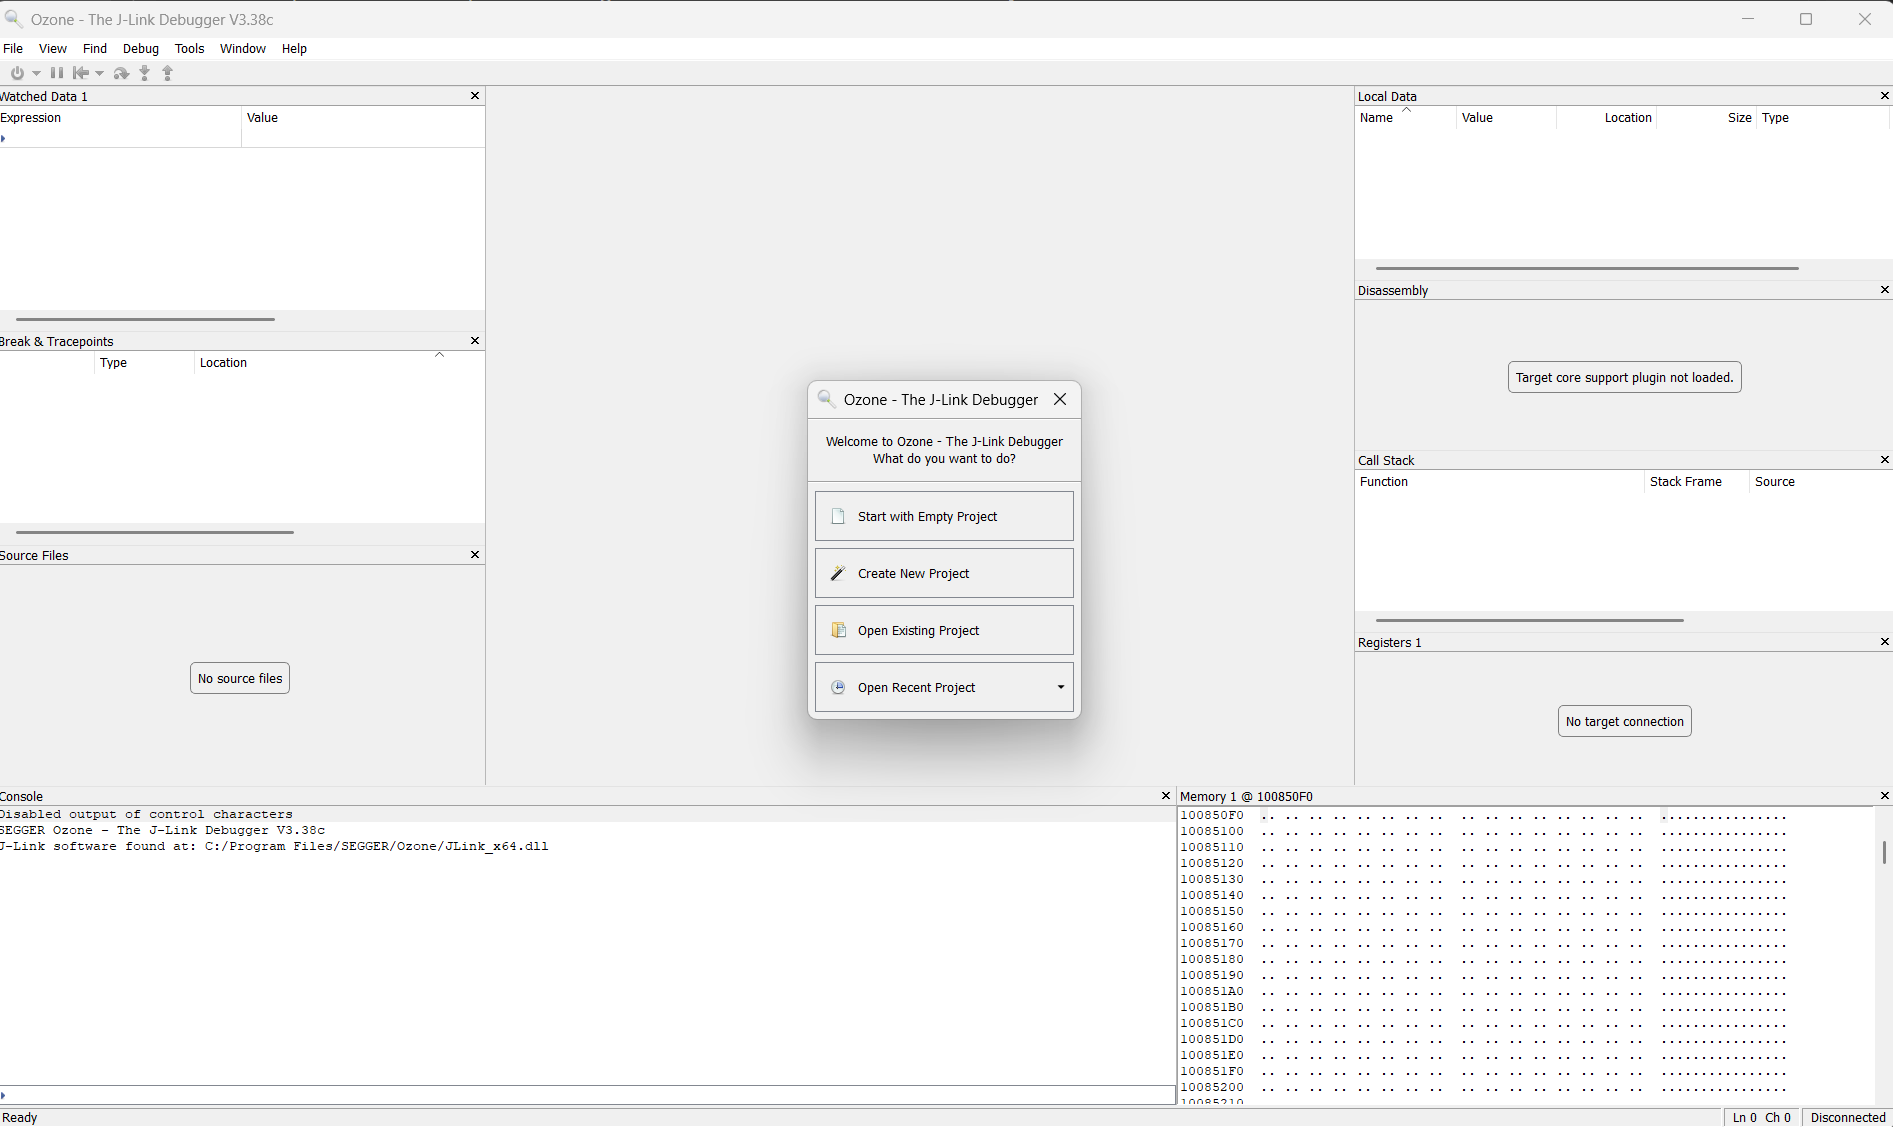
- Browse to the project’s
.jdebug file, select it, and click on the 'Open' button.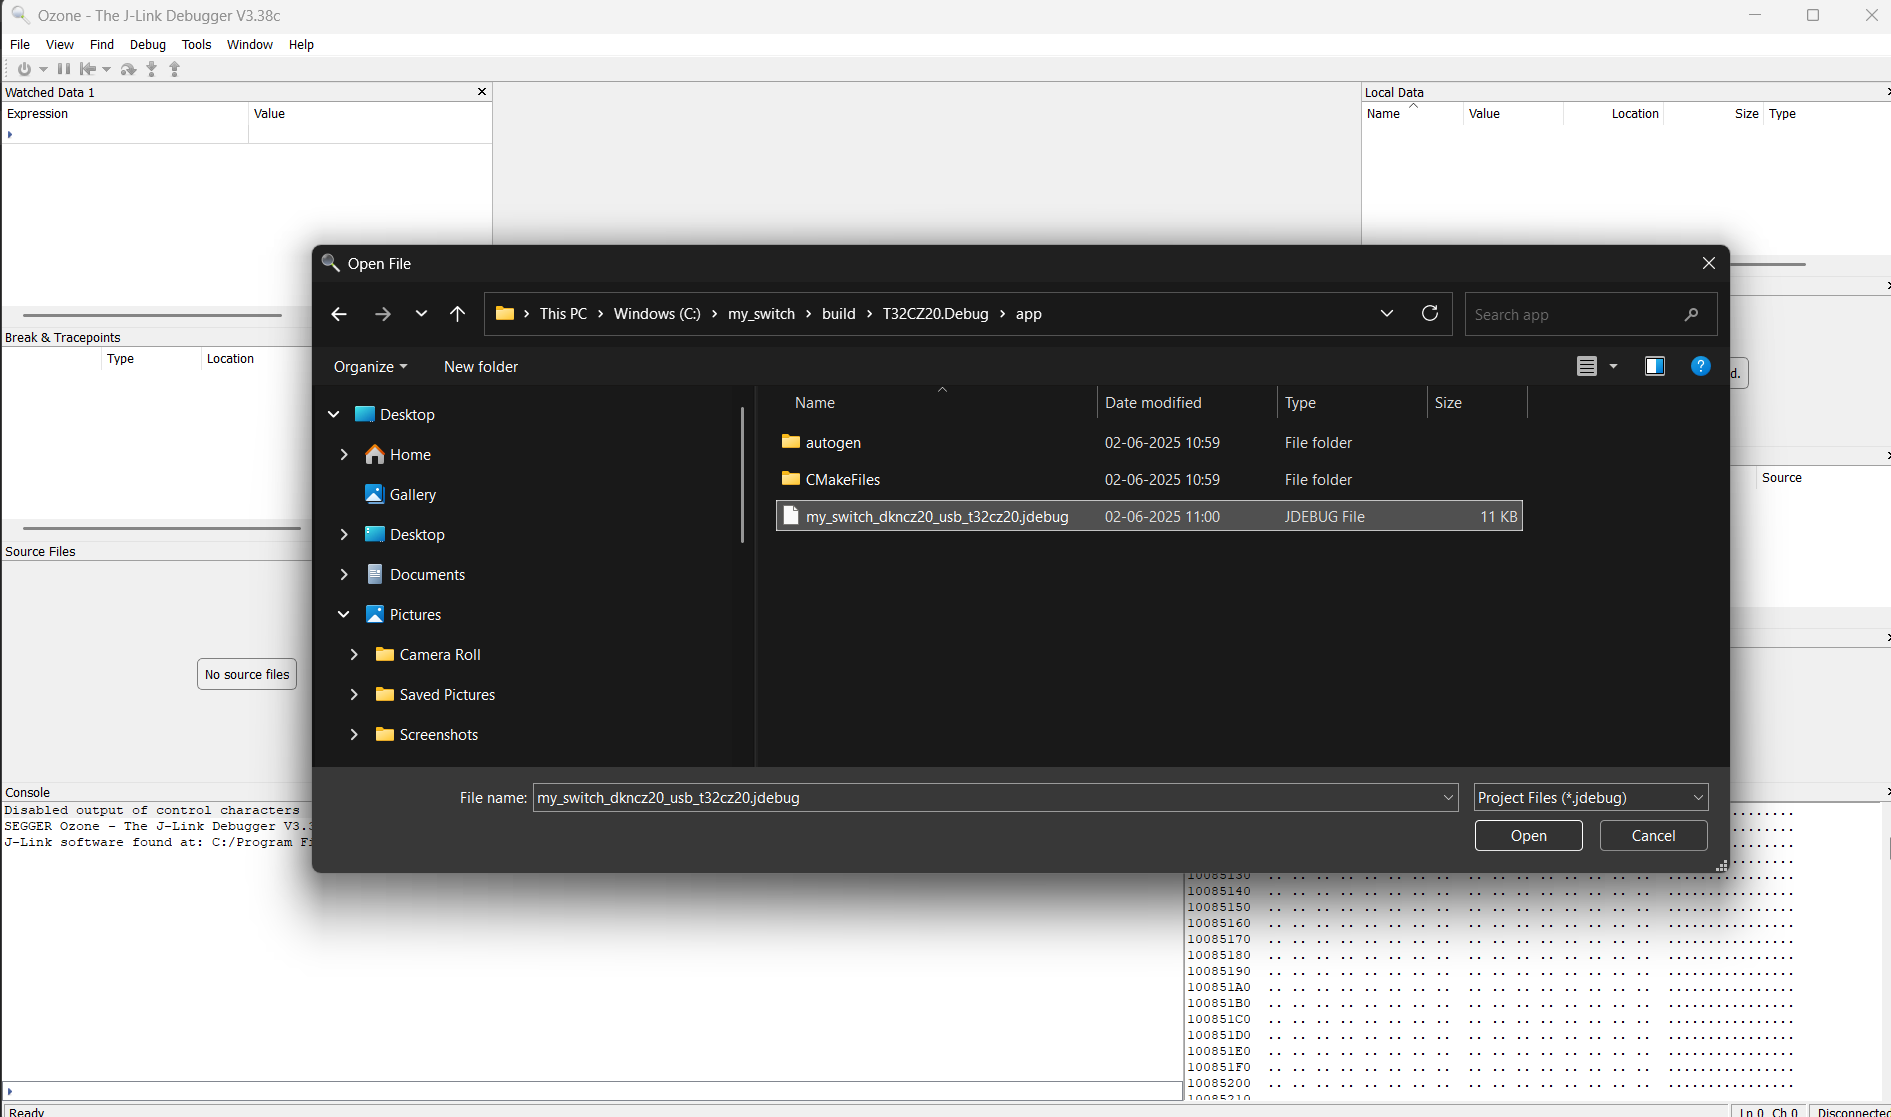
- After Ozone loads the project, click on the green down arrow on the left side of the icon bar. Then select the 'Attach to Running Program' option.
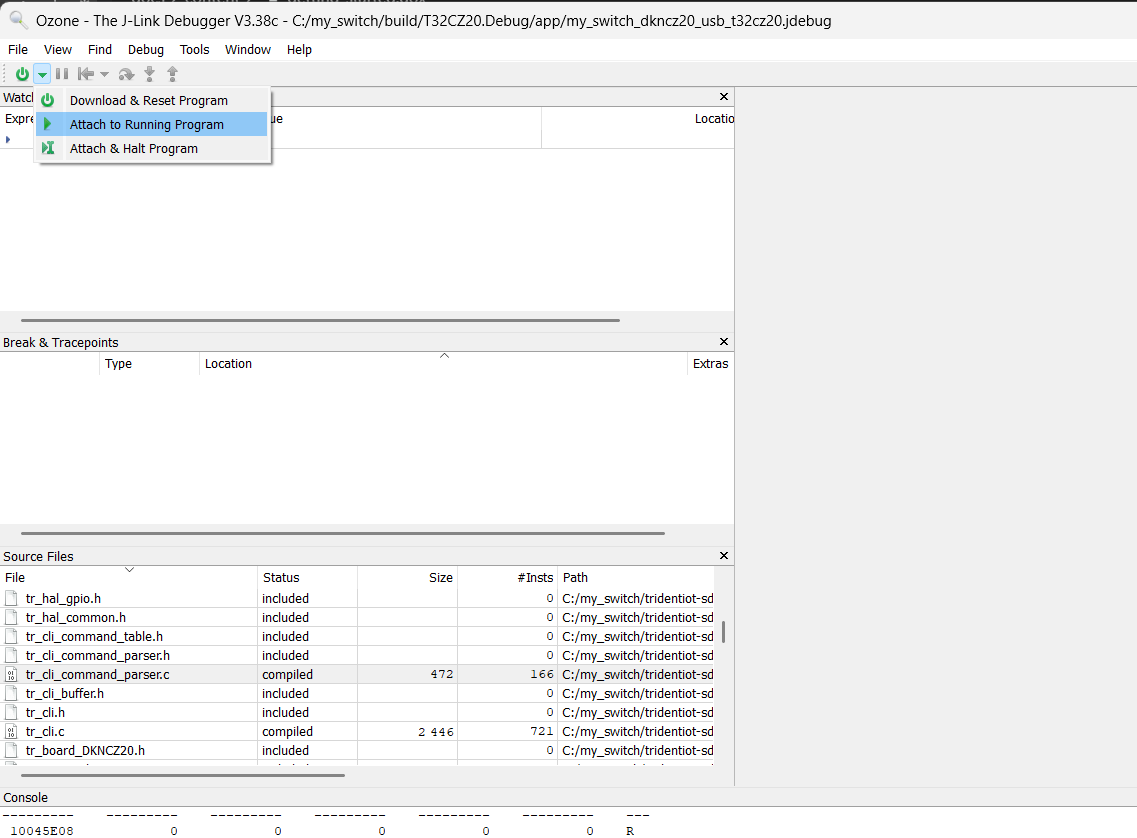
- Ozone is now connected to the module. You can create breakpoints or watch variable values.
- In the 'Source Files' window, double-click on the 'app.c' file to open it. Then, go to line 154 and click on the gray dot to create a breakpoint.
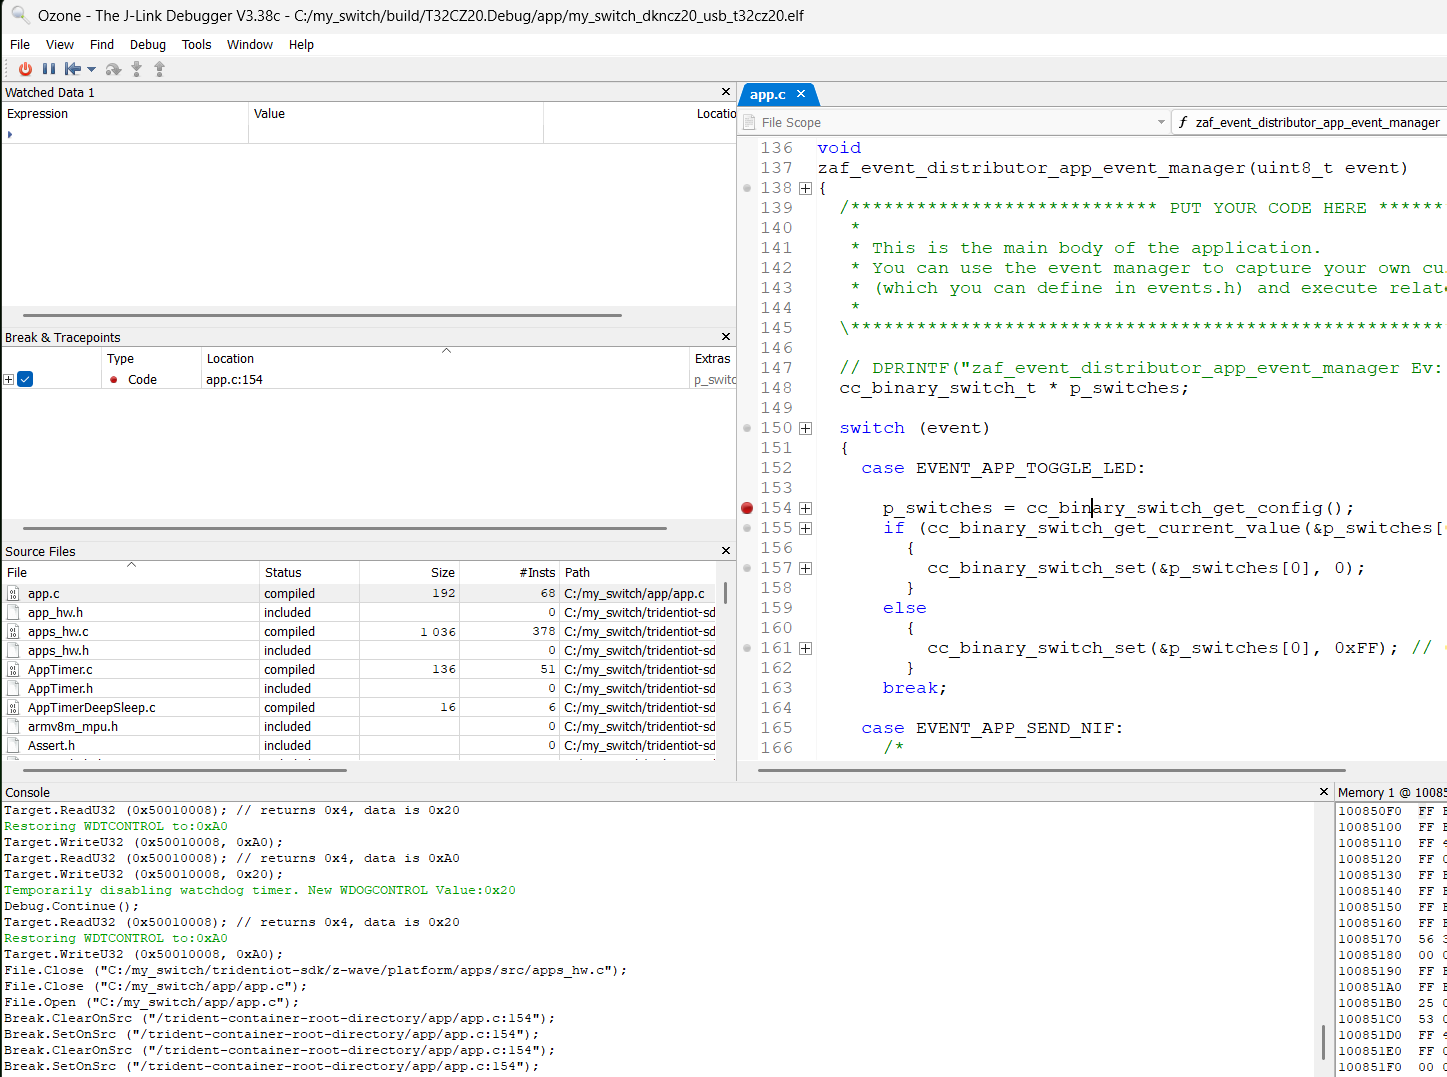
- If you press the BTN2 push button on the T332CZ20B module, you will hit the breakpoint.
- To view the value of the local variable
p_switches, single-step through the code by pressing the F10 button. The value will be displayed in the 'Local Data' window. You can also add the variable to the 'Watch Data 1' window.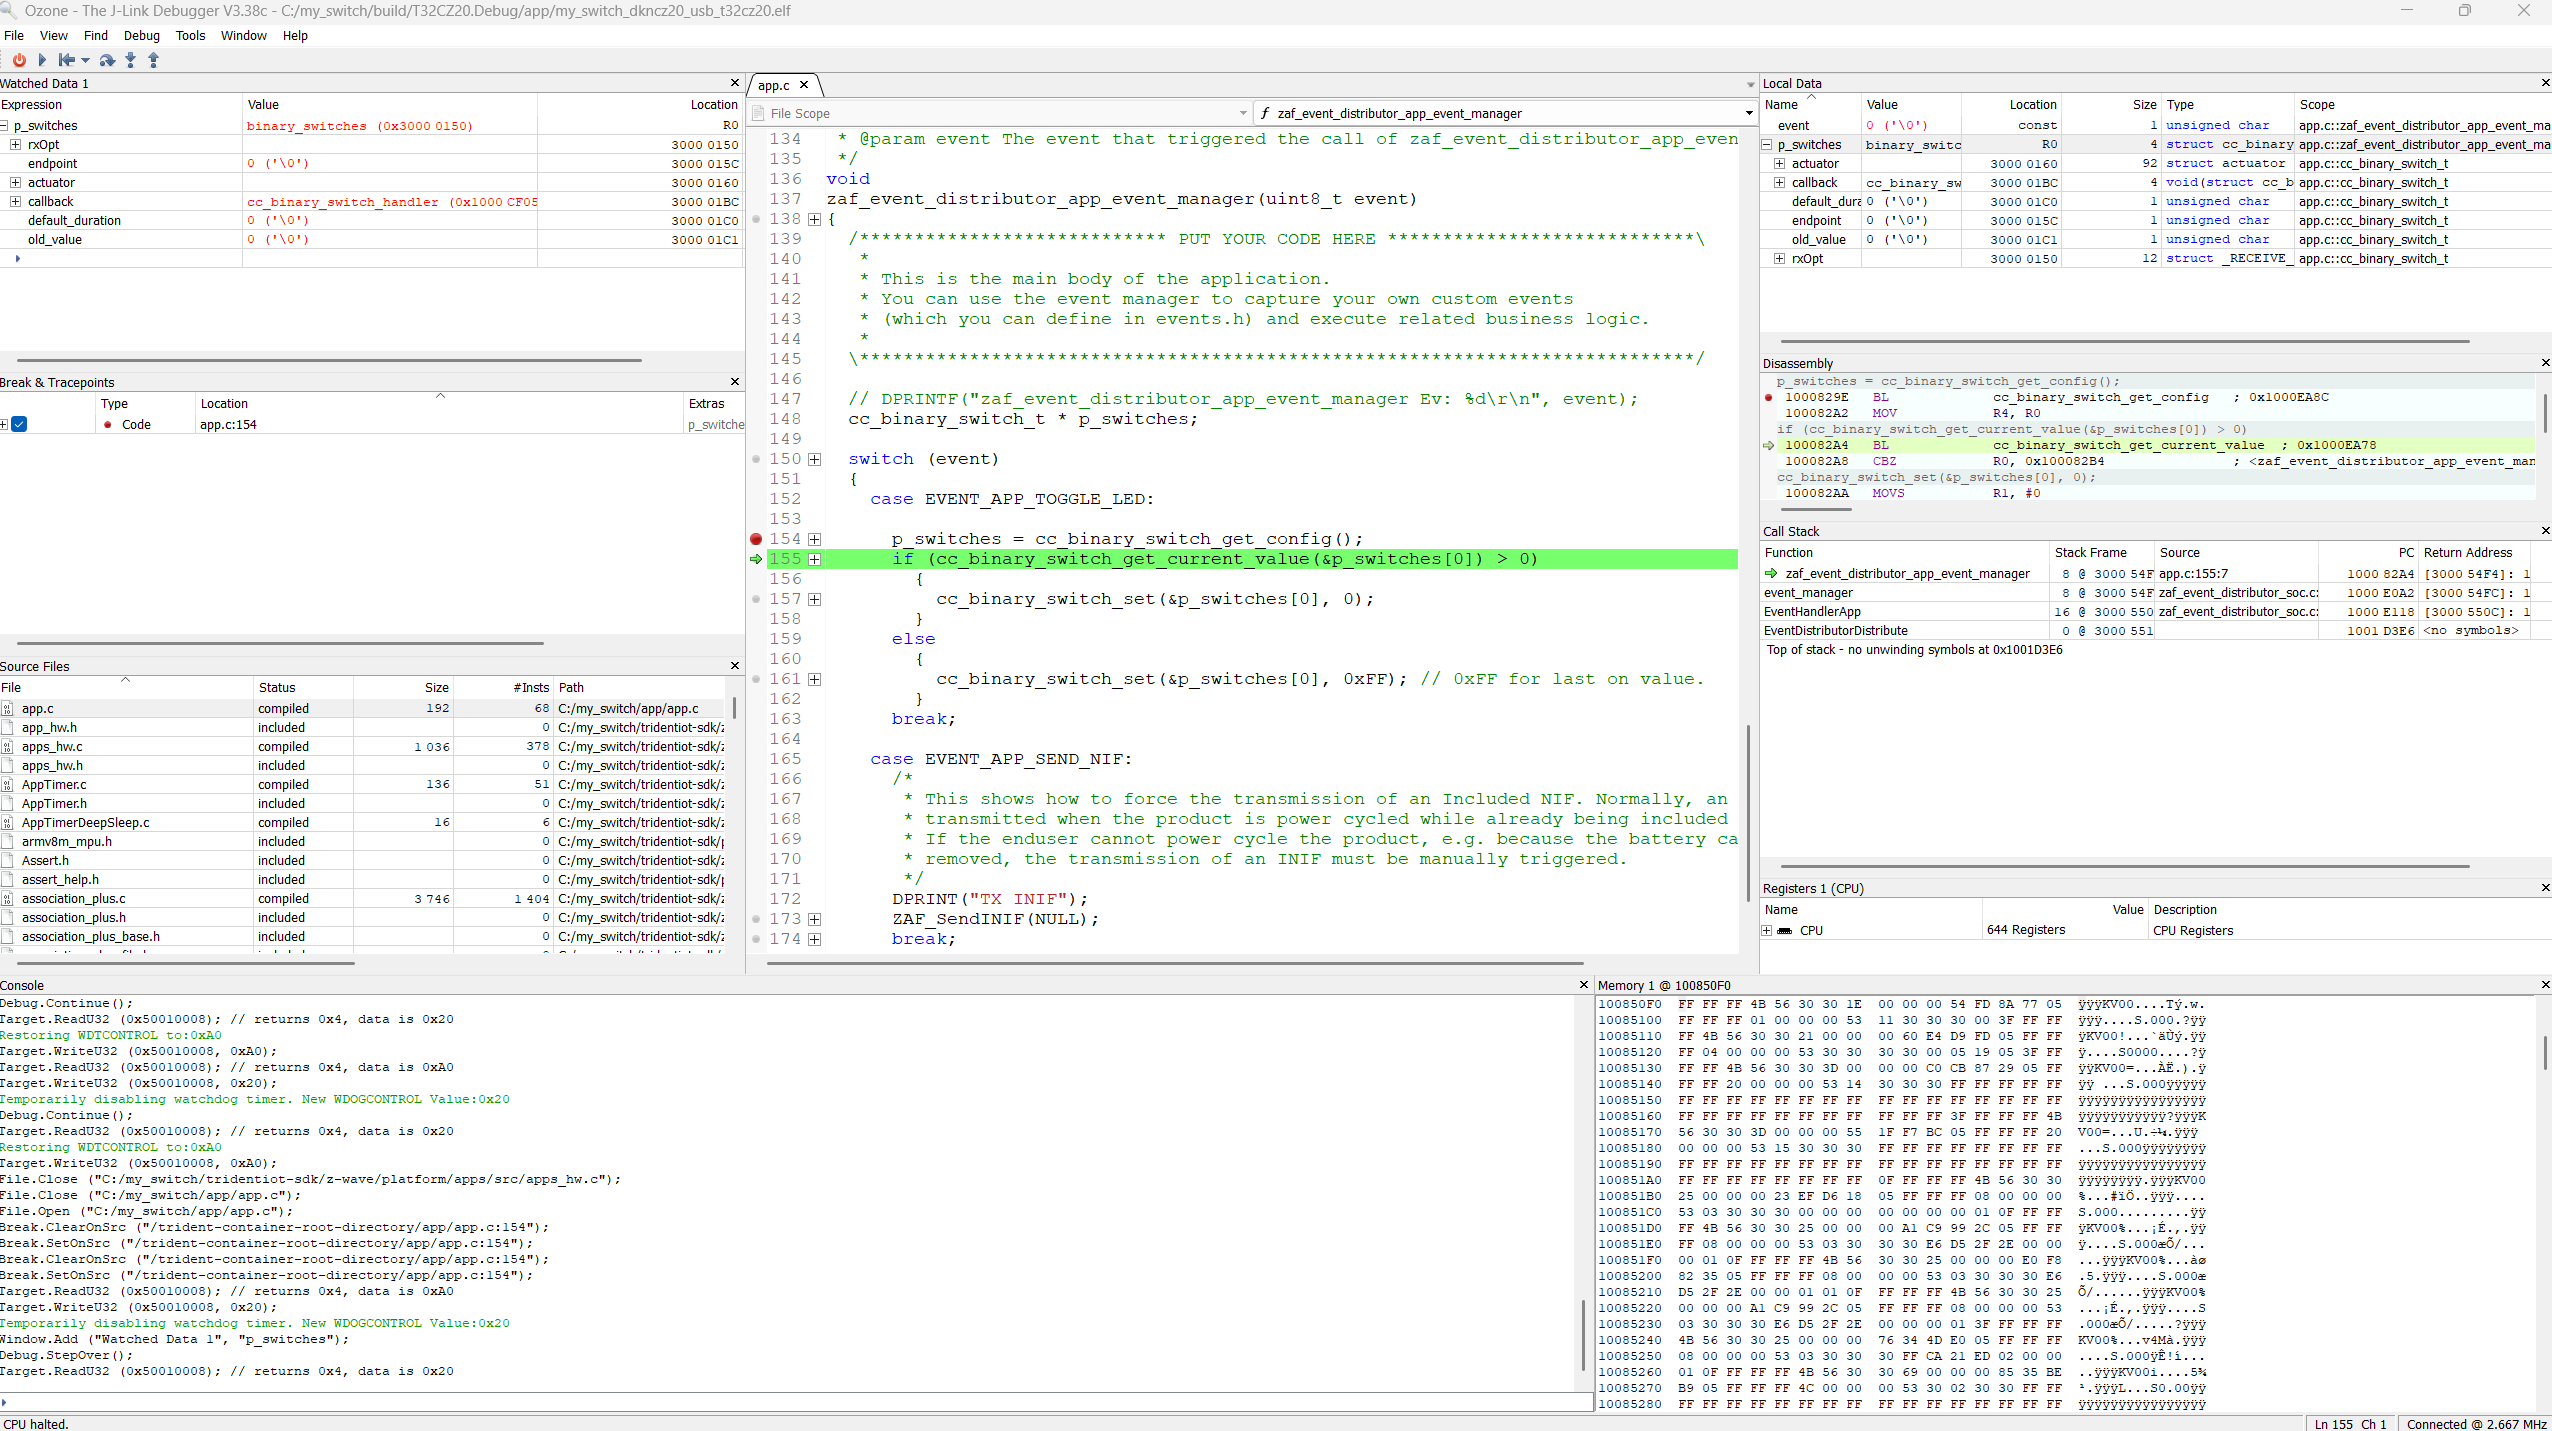
- To continue program execution, press the F5 button.
For more details on SEGGER Ozone, press the F1 button while Ozone is in focus to view the 'User Guide & Reference Manual.'


